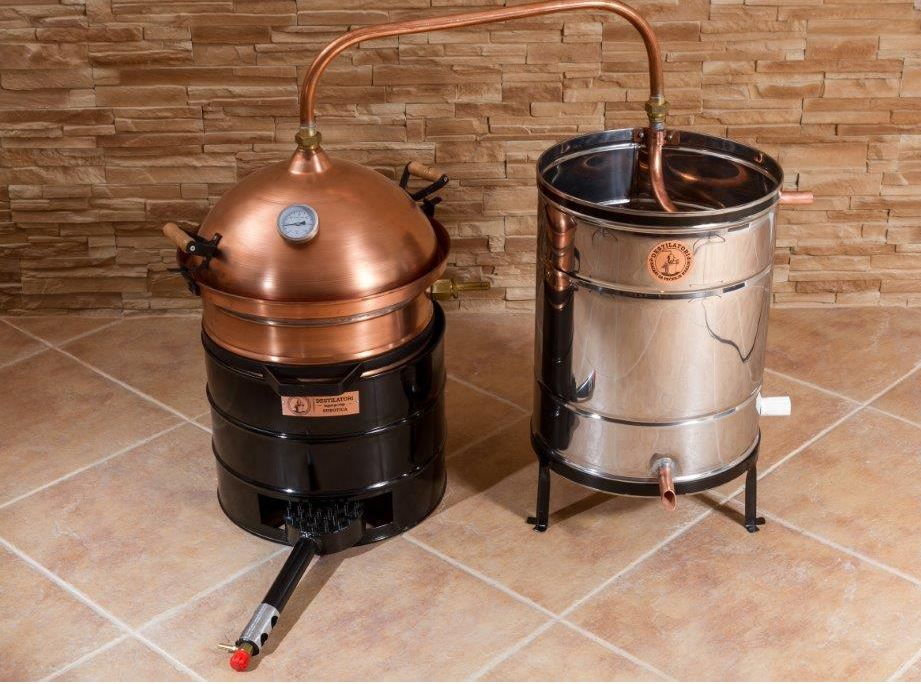
Distilling wine

There can be several reasons for distilling your wine. Perhaps you have made wine yourself and the wine is not as tasty as you expected. Or you still have a number of old bottles of wine that are well out of date. In that case you can heat up the wine with a still and turn the wine into a delicious drink. But you can also distil good wines into a tasty drink. You can also experiment by adding extra grapes or other fruits to your wine before starting the distillation process. If you are going to distil wine, it is important to separate the pre-run from the distillation, the middle and trail. You can read exactly how this works here. All of our copper pot stills are suitable for distilling wine.

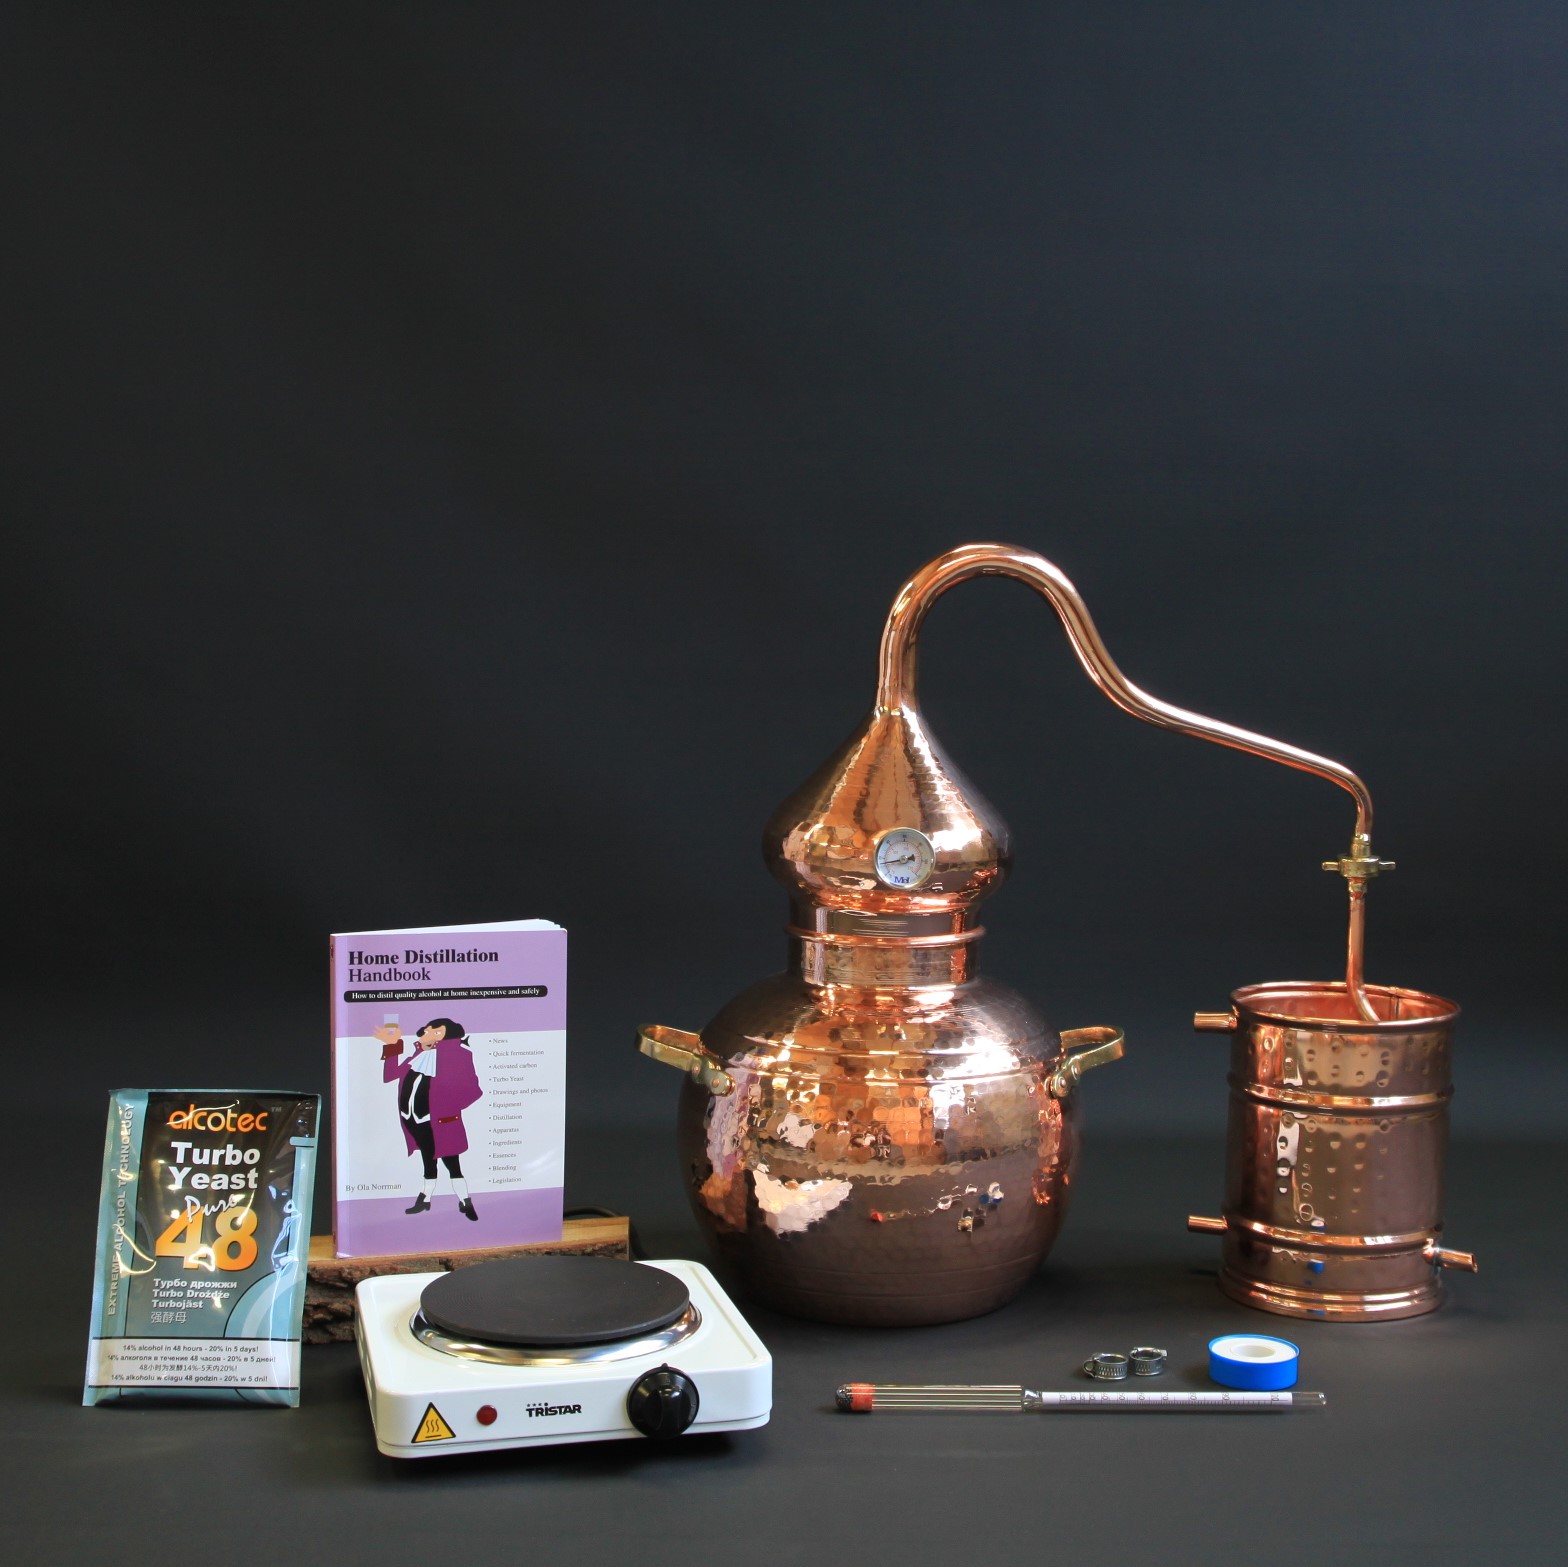
Making cognac is double distilling white wine

A commonly used still is the Charentais alembic still. This still is the only type of still allowed in the Cognac area to make real French Cognac. Cognac is a brandy, made from white wines. That wine must consist of at least 90% uni blanc, colombard and folle blanche grapes. Cognac is made by distilling white wine twice, resulting in an alcohol percentage of at least 40%. After the first distillation, the distillate is again poured into the still and heated and distilled again. This process is called double distillation. After distillation, cognac must mature for at least 2.5 years in oak barrels. This oak provides the characteristic vanilla flavour and tannins in the drink. Officially, a drink can only be called cognac if it meets the following conditions:
– Double distillation of white wine.
– White wine must consist of 90% uni blanc, colombard and folle blanche grapes.
– The drink must be distilled with a Charentais alembic still.
– The drink must come from the region of Cognac.
– The alcohol percentage must be at least 40%.
– The drink must have been aged in wooden barrels for at least two and a half years.

Charentais alembic stil | distillation supplies

Charentais alembic still for making cognac


Age your whiskey, wine, rum, liqueur and other drinks

Distilling and ageing drinks yourself is very satisfying. It is exciting and fun to taste the result. There are all kinds of barrels on the market for storing and ageing homemade alcoholic drinks. Wooden barrels have been used for centuries and are available in different types of wood. Many types of wood have been used to make barrels: mulberry, chestnut, acacia, beech. Of all types of wood, oak appears to be the best type of wood for storing and ageing drinks such as whiskey, liqueur, rum, wine and other drinks.

The advantages of a French oak wooden barrel and ageing drinks

The advantage of ageing in French oak wood is that the wood aging adds flavouring and aroma, like dill, toast, coconut and vanilla. It is no coincidence that the best wineries such as Burgundy and Bordeaux almost always opt for French oak. In some areas it is even legally stipulated that whiskey may only age in oak barrels. French oak wood is bendable and strong at the same time. In addition, it ensures stability and clarity of the drinks.

Our wooden barrels are hand made from French oak and therefore of very high quality. The barrels contain no paraffin and are lightly charred on the inside (lightly toasted), which in our view is optimal for ageing drinks. The barrels can be used to pour drinks from or to age drinks. These are new barrels, which makes it important to use them correctly. Please consult the manual supplied with the product.

Please note: manual for wooden barrels

To prevent the barrels from leaking, it is important that the instructions below are followed after receipt of the oak wooden barrel.

Preparing the barrel
A container that is new or stored dry needs a period of swelling to close the seams. There are 2 methods, cold or warm. The 2nd method is also known as the French method. Which method you use depends on how the barrel is stored. If it has been stored in dry conditions for a long time, i.e. not in a damp cellar, it is best to use the cold method. If it has been used recently or has it been stored moist, you can use the warm method.

The cold method
Fill the barrel 1/3 with cold water and let it sit for 3 to 4 hours. Then top up to 2/3 with cold water. After another 4 hours fill to the brim and keep it filled until all seams are swollen shut. Once this has been done, you can start using the barrel. This process takes about 2 days and sometimes longer with old barrels.

The warm method
Fill the barrel 1/10 with hot water. Tape the holes shut and shake the barrel so that all parts properly come into contact with water. Stand the barrel upright and fill the top to the brim with hot water and let it sit for 15 minutes. Then turn the barrel around and repeat the procedure for the other side. Remove the tape and drain the barrel. Fill the barrel with cold water to make sure the barrel is closed. If the barrel is still leaking, use the cold method.

Important
Never leave a barrel full of plain water for more than 2 days. This is to prevent bacteria from growing in the vessel.

Cleaning a barrel
The best way to clean a barrel is to rinse it a few times. The barrel should always be rinsed immediately after emptying a drink to prevent organisms from growing in it. Rinsing should be done with hot water. Repeat this rinsing until all remaining substances have dissolved and been rinsed away. Always finish with a rinse with cold water.

Avoid the use of chemical agents in the barrel if possible. These agents extract substances (tannins) from the barrel.

Storing a barrel
If you have bought a barrel and you are not going to use it right away, leave it wrapped in the foil. This prevents moisture loss from the wood. The best storage place for a barrel is at a temperature below 12 degrees and a humidity of 75%.

View our oak wooden barrels for storing and ageing your homemade alcoholic drink.


How do I separate the heads (foreshot), hearts (middle cut) and tails (feint)?

Are you thinking about making your own liqueur, whisky or other moonshine? You have come to the right place. You may have already read a thing or two about the heads, hearts, and tails. You can read about how to distinguish the three below..

Heads

When distilling, you should separate, or cut, the heads, hearts, and tails. The head of the distillate is the first portion of the run. You can recognise it by its smell. It has an unpleasant smell like nail polish or methylated spirits. You throw away the heads or you can keep it to use as a fire starter for your BBQ. This is approximately 2% of the first distillation (base spirit) from the initial mash. The distillate from the first distillation is also called base spirit or low wine. Another method to determine when to cut the heads is by determining the alcohol percentage. This percentage is very high at the start of the distillation process, 80% and higher.

Hearts

When the alcohol percentage falls below about 80%, it is time to cut the heart. The heart is the largest portion of the run. It smells fragrant and tastes good. The heart is the liquid you want.

Tails

When the alcohol content has dropped to 50 percent, we proceed to the final cut, or tails. The smell of the tails is difficult to describe, terms such as “plump”, “greasy” and “brownish” are sometimes used. When you rub it between your fingers, it feels oily. The tails should also be discarded.

View all our copper stills here.


Making your own spirits, this is how to do it!

Making your own spirits is nothing new, it is an art that dates back centuries. But nowadays it takes less time and effort in making a good drink yourself. Wondering how to make your own spirit? Carry on reading!

What do you need to make your own spirit?

First, you need a still to make your own spirit. Which still you need depends on the type of drink you want to make. The standard Moonshine alembic still is suitable for most types of spirit. Do you want to distil whisky? You can use a special whisky still for this. When adding fruit pulp, you can prevent caking by using the hobby still with scraper. If you want to use herbs or make essential oils, a column still is the best option.

Getting started

When the still is more than three-quarters full (due to a larger vapour surface) with the mash, you can start heating the still. This is the start of the distillation process. A still consists of three or four different parts: the boiler, the cooler, the helmet (also available in 2 parts). Always make sure that the helmet is properly secured inside the boiler.

Fill the cooler with water and ensure a smooth flow of cooling water by means of a hose. Always allow the cooling water to flow in through the bottom of the cooler. Place a piece of hose at the top of the cooler to gently drain the water.

Do you have any questions about distilling your own spirit? Get in touch. We are happy to help.


Making vodka

Vodka is a bland spirit with no specific character, aroma, taste, or colour. These properties are developed during the distillation process or by treating crude spirits with activated carbon or other substances. Well-distilled vodka can be further purified and refined by treating it with activated carbon and other substances. Vodka is normally not matured and can be made from grains, potatoes, sugars, fruits and just about any other product that can be fermented into alcohol. This makes vodka an economical spirit that can be made simply and quickly from readily available ingredients. Below you find everything for making vodka.

Selecting ingredients by making vodka

  1. Select the ingredients you want to ferment into vodka. Vodka is normally made from wheat, rye, barley, corn, or potatoes. You can also use sugar and molasses, either as the main ingredient or in conjunction with other ingredients. There is even a distiller who makes innovative vodka from red Pinot Noir wine. Whatever you choose, it must contain sugars or starches. This is necessary to produce alcohol. Yeast eats sugars or starches and emits alcohol and carbon dioxide.

    • When making vodka from grains or potatoes, you need to make a mash that contains active enzymes that break down the starch from the grains or potatoes and convert it into sugars that can be fermented.
    • Fruit juice already contains sugars, so when using this you don’t need enzymes that break down starch. If you make vodka from sugars, you only have to ferment it, just like with vodka from fruit juice, and you don’t have to make a paste.
    • If you make vodka from a drink that has already been fermented, such as wine, you can immediately distil it and turn it into vodka.
  2. Make sure you have enough of all the ingredients for your mash. If you’ve decided to use only potatoes for your vodka, for example, they’ll need a little extra help converting their starches into sugars. That is what the enzymes are for. Use this table to see if you need to add extra enzymes to your mash to convert starches into sugars:

                                Ingredients you will need to make your mash

    IngredientsDo you need enzymes?Additions
    Cereals and potatoesYes.Cereals and potatoes are sources of starch, not sugars. Enzymes are therefore necessary to convert the starch into sugars.
    Malted grains such as malted barley and malted wheatNo. Malted grains naturally contain a lot of enzymes that convert the starch into sugars that can be fermented.The enzymes in malted grains are activated when the grain cracks open and is briefly exposed to warm water. Ground and malted grains can be used alone, as they contain starch, or you can add them to a starchy but low-enzyme mash. Choose malted grains that are rich in enzymes, such as malted wheat.
    Refined sugar and molassesNo. These naturally already contain sugars and therefore the yeast does not need additional enzymes.You can make vodka from just sugar or you can add sugar to starchy mash to make it more fermentable.
  3. Check to see if your mash’s ingredients need additional enzymes. You can buy amylase enzyme powder that is suitable for consumption on the internet. Add this powder to your mash to convert starch into sugars when using potatoes, for example. Use the amount recommended for the amount of starch to be converted. You don’t need to use malted, enzyme-rich grains such as malted barley if you are using enzyme powder.
    • For the enzymes to convert starch into sugars, including starch from malted, enzyme-rich grain, the starch must first be gelatinised. Flaked grains are often gelatinised. Ingredients that have not been gelatinised, such as potatoes and non-flaked or malted grains, must be heated in water until they reach the temperature at which the starch will be gelatinised. Potatoes usually gel at around 66 °C and barley and wheat usually gel at around a similar temperature. So a mash of potatoes only needs to be heated to 66 °C. If you heat the potatoes to a low temperature, they should be shredded very finely before putting them in the water.
    • Enzymen die zetmeel omzetten, werken alleen op heel specifieke temperaturen en worden vernietigd als ze te heet worden. 66° C is een goede temperatuur maar als ze verhit worden tot boven de 70° C zullen ze vernietigd worden. De absolute maximum temperatuur die ze aankunnen is 74° C; in deze temperatuur zullen de enzymen een tijd hun werk doen en je kan dus ook je brij tot deze temperatuur verhitten, maar het grootste deel van de enzymen zal vernietigd worden.


    • 1 Try a wheat mash. In a 38-litre pot with a lid, heat 23 litres of water to 74 °C. Add 7.6 kilograms of dry flaked wheat and stir. Check the temperature and keep it between 66 °C and 68 °C. Now stir in 3.8 kilograms of crushed and malted wheat. The temperature should now be about 65 °C. Now put the lid on the pot and leave the mixture to stand for 90 minutes while stirring occasionally. During these 90 minutes the starch is converted into sugars and the mixture should become a lot less thick and viscous. After 90 minutes to 2 hours, let the mixture cool to a temperature of 27 °C to 29 °C. Leave it to stand overnight and cool slowly, but do not let it fall too far below 27 °C.

    • 2 Try a potato mash. Clean 9 kilograms of potatoes. Cook them in their skins in a large saucepan for about an hour until gelatinised. Discard the water and mash the potatoes well with a masher or in a food processor. Return the mashed potatoes to the pan and add 19 to 22 litres of water. Stir well until you get an emulsion and heat it to about 66 °C. Add 1 kilogram of crushed and malted barley or wheat to the mixture and stir well. Put the lid on the pan and leave it to stand for about 2 hours. Stir it every now and then. Leave it to cool overnight to between 27 °C and 29 °C.

      • If you let your mash cool slowly, you give the enzymes from the malted barley more time to break down the potato starch.
      3 Try a corn mash. Make a mash as you did with the wheat mash recipe, but replace the wheat with flaked, gelatinised corn. You can also germinate your corn, so you won’t have to add malted grain to your mash. There should be a sprout of about 5 cm from each grain of corn. The germinated corn contains enzymes that are formed during the germination process.

Fermentation by making vodka

  1. Clean all your equipment and prepare your workplace. Fermentation takes place in clean and disinfected vats that are sometimes open, but usually sealed airtight to avoid risk of contamination. Fermentation usually takes about three to five days.

    • Fermenting can also be done in barrels that have not been cleaned or
      disinfected and the result will also be drinkable alcohol, but because there may
      still be bacteria or yeast residues in the barrels, unwanted flavours or a higher
      amount of alcohol may develop during fermentation.
    • There are special cleaning products for sale on the internet such as B-Brite and a disinfectant called iodophor. You can buy these to clean your barrels with.
  2. Select and install your airlock lock. An airlock is a mechanism that allows CO² to escape without O² entering. 19 litres of drained mash can be fermented in a bucket with a capacity of 28 litres or in a fermentation bottle with a capacity of 23 litres. A bucket must have a lid attached and there are special caps for fermentation bottles, but you should never completely close the bottle or bucket as the pressure built up by the carbon dioxide can cause the bottle or bucket to explode. That’s why you need to attach an airlock to the lid or cap.
    • If you are fermenting your mixture in an open bucket or container, place a cheesecloth over the bucket to keep insects or other unwanted items from ending up in the mixture.

    3. Drain your mash into the bucket or bottle in which you will be fermenting. If you made a mash, use a fine strainer to drain all the liquid from your mash and drain that liquid into your well-cleaned bottle or bucket. Try to let the liquid splash into it and pour it in from as high as possible. This allows plenty of oxygen to enter the liquid. In the beginning, yeast needs oxygen to grow and ferment properly. This is because yeast makes cellular material in the form of lipids from oxygen. But after the yeast has passed this growth phase, no more oxygen should be added. Yeast makes alcohol when no oxygen is present.

    • Alternatively, you can also let your mash ferment without draining it first. But if you do this, you must get some air into the mash. For example, you can use an oxygen pump from an aquarium or an oxygen stone. You should drain some of the liquid from the mash first. It is also easier to ferment the smaller amount of mash left over after pouring, as the mash may overflow from the bottle or bucket during fermentation.
    • If you are using a mixture made of sugar, you should also mix in as much oxygen as possible by pouring it in high and allowing it to splash.
    • If you are using fruit juice, also pour it from as high as possible into the bottle or bucket and run it through a strain.


    • Add yeast to the mixture you want to ferment. If you are using grain yeast, it is best to hydrate it first. Then stir the yeast into your mixture with a clean, sanitised spoon. If you use an airlock, it will bubble during fermentation. When the fermentation is almost done, the bubbling will diminish or stop completely when your mixture is fully fermented. Place the fermenting liquid in a room with a temperature of about 27° to 29 °C for the best, most efficient fermentation. If you don’t want to set the heating that high, you can also heat the liquid with a heating belt or with a light bulb. Do not allow the light to shine directly on the liquid.

      • You can buy yeast that is specifically designed for distilling. This type of yeast works very well and produces a lot of ethanol during fermentation and fewer by-products and unwanted types of alcohol. How much yeast you should use depends on the type of yeast you have.
      • The packet may include yeast nutrients. Yeast nutrients are needed if you are using a mixture that does not contain as many nutrients on its own, such as sugar mixtures, but they can also improve fermentation of nutrient-dense mixtures such as grain mixtures.

    Collect the fermented liquid. Pour the fermented alcoholic liquid into a cleaned and sanitised bucket or bottle or directly into the still. Make sure you don’t add the yeast from the bottom. This could burn when heating the still. You can also strain the fermented liquid again or filter it in another way before distilling it.

Distillation

Preparing for distillation. Copper stills heat the fermented liquid with a relatively low alcohol content until it reaches a temperature higher than the boiling point of alcohol but lower than the boiling point of water. This allows the alcohol to evaporate while most of the water does not. The evaporated alcohol (and that part of the water that has evaporated) goes up the column, pipe or tube of the still. That column, pipe or tube is cooled from the outside with cold water so that the evaporated alcohol cools down and condenses and becomes a liquid again. This alcoholic liquid is collected and becomes your vodka.

  1. Heat the fermented liquid in the still to start the distillation process. How you should heat your still depends on what type of still you have. It can be done on a gas burner, wood fire or an electric hob. The desired temperature is 78.3 °C, but the temperature should not in any case exceed the boiling point of water, 100 °C. As the fermented liquid heats, the alcohol and other substances evaporate and condense back into the part of the still that is cooled by water.
  2. Discard the first portion. The first portion of distilled liquid contains many harmful substances such as methanol and other dangerous chemicals that you shouldn’t drink. If you are distilling 19 litres of liquid, you must discard the first 30 millilitres of distilled liquid. Collect the good alcohol. After you discard the first few drops, the next amount of distilled liquid will contain the desired ethanol alcohol along with some water and other substances. If you are using a column still with flowing cooling water, you can adjust the amount of cooling water you use to affect the amount and quality of the distilled liquid. Try to make sure that the amount of liquid that comes out of your still is between two and three teaspoons per minute. If too much is distilled too quickly, the quality can deteriorate.
    Discard the last portion. Towards the end of the distillation when the temperature rises to around 100 °C or above. This last portion contains fusel oil. These last few drops do not taste good and must be discarded.
  3. Check the alcohol percentage and purity of the distilled liquid. Cool some of your distilled liquid to about 20 °C and use an alcoholmeter to determine its alcohol content. There may be too little alcohol in the distillate (less than 40 percent alcohol) or it may be too concentrated (greater than 50 percent alcohol). Vodka is usually diluted before bottling, so the distillate can have a very high alcohol content. The distillate can also have too much flavour or be too aromatic and so may need to be distilled or filtered again.
  4. iDistil the distillate again if necessary or desired. This increases the alcohol percentage and increases the purity of the distillate. It is very common to distil the distillate 3 times or more to get a high-purity vodka.

Final steps:

  1. Treat the distillate with an activated carbon filter if necessary. Pour the distillate through a carbon filter, which is available to buy on the internet, to remove unwanted flavours and aromas. A carbon water filter can also be adapted to increase the purity of your distillate.
    2. Dilute the vodka until it has the right strength. Add demineralised water to your vodka until it has the desired alcohol percentage. Use an Alcoholmeter to measure the alcohol percentage.

    3. Bottle the vodka. Fill bottles with your vodka and seal them with a cork or cap. The best way to do this is to siphon and tilt the bottle as you fill it. You can make your own labels if you like. You can also buy a special machine to fill your bottles, but that is expensive and if you are producing for home use, it is better to bottle by hand.